RV Maintenance
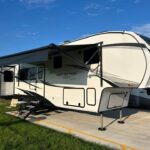
Maintaining an RV is much the same as maintaining a house, except that it needs to be done on a more regular basis. Things seem to go wrong with an RV much more easily than with a house. Of course, a house doesn’t rock n roll down a pot-hole-filled road! We have to stay on top of and ahead of maintenance with the RV. In the pics below, we share some of our most recent projects. Please view the pics and photo comments.

The roof is the biggest maintenance concern on an RV. Even a tiny gap in sealant can allow for water intrusion. Once the water finds a way in, it will do significant damage long before you notice anything awry on the inside of the RV.

Here, Ken is resealing the rear cap of the RV. The process involved thoroughly washing the seam with soap and water, drying it, then cleaning it again with isopropyl rubbing alcohol, then using a self-leveling DICOR sealant over the seam and screw heads.

This is the finished seal. Peep the grasshopper! Let’s hope he didn’t hop into the sealant or it would be his last hop!!

This is a roof/attic vent. It vents the space in between the ceiling and the actual roof. It was one of these vents that had a small crack that caused the damage to our roof last summer. Some of you will remember from previous posts that Grand Design replaced or ENTIRE roof at no cost. Thank you, GD!!

Ken is in the roof of our RV doing an “intrusion” inspection.

This is the shower skylight. Some of the self-leveling sealant applied by the manufacturer has started to open and allow for water intrusion.

Peep this gap in the sealant!! This happened pretty quickly and was the cause of some water seepage from the roof into the shower sky-light.

Our best fix for this area was the use of eternabond tape. It works great and is way less messy than liquid sealant.

This is one of the two roof-top air conditioning units. We clean these 2-3 times per year. This one is very caked with lint, pollen, dirt and debris.

In this pic we have scraped clean one-half of the condenser coils.

After the coils are scraped clean, brushed through,and blown out with a reverse vacuum, we use a spray to clean the coils.

This is the final product! All clean and ready for cooling!

Chris is on the roof, brushing the debris off of the slide-out topper.

We recently recoated the roof of one of the rental RVs at the campground. We used Henry’s Tropi-cool sealant.

This is the outside of our on-demand water heater. The water heater needs to be flushed every so often to get rid of calcuim buildup and sediment collection. Otherwise, it won’t operate correctly.

This is the inside of the water heater.

All of our doors (entry and cargo) have keyless RV Lock brand locks. We needed to change the batteries in all three locks! That A LOT of AA batteries!

The outside of the lock.

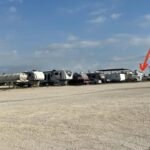
We will be hitting the road in early November, moving from SW Michigan to our next work-camping job (hint…somewhere warm). We did an undercarriage and suspension check on the RV, so if we needed anything done, we would get it done between now and Novemebr.

The leaf-springs, hangers, u-bolts and equalizers all looked good. We will grease the bolts before we hit the road.

These are the “wet-bolts” of the equalizer. If you look closely at the center, you’ll see how this equalizer has shifted down a little.

THIS IS NOT OUR TOILET!!! We were asked by a guest at the campground if we could help them as their toilet wouldn’t flush. Chris used our tank jetter to get into the tank and clean it out. Then Ken jetted from inside the RV, through the toilet. After about 30 minutes of jetting in both directions, we cleared the poop jamb and the guest was “back in business”!

Chris is jetting the black tank from the outside of the RV. It’s a “shitty” job!!